Wednesday, May 1, 2019

How to fix: Missing third party device support for nRF51422xx

In this post we will address the following error, which can happen even if you do have the packs installed for the nRF51/52.

You will see something like this:
"Missing Devices - The Project references devices, files or libraries that are not installed.  Download and install: Third Party Device Support for Nordic Semiconductor: nRF51422_xxAC" or similar.
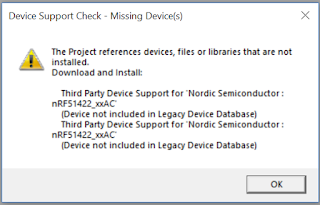
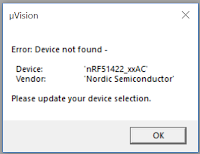

After you've pressed "OK" on both dialogue boxes, the first thing to check (although you may have already done this) is locate the pack installer and install the packs for the devices that are missing.


1. Click the pack installer.
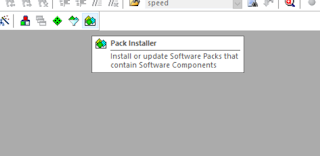

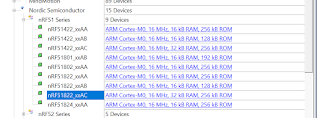
2. Locate the manufacturer and specific device you are using on the left-hand pane of the Pack installer (click for larger image).

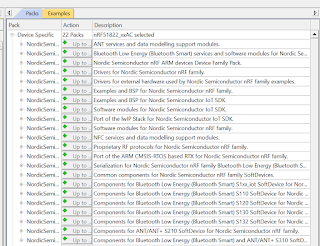
3. On the right-hand pane, select the 'Packs' tab, and install all the packs.  In this example, you can see drivers, soft devices, software modules and so on.  Install them all.  From the "Generic" section below, install all the ARM (CMSIS, etc.) packs.  Ignore all the other generic packs.  Do not install any examples from the 'Examples' tab.


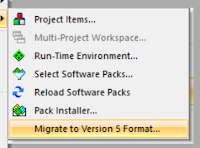
4. Close down Keil uVision and re-open your project file.  If the error no longer appears then you can stop reading here.  If the same error message re-appears, the most likely culprit is that you're opening a project file from an older version of uVision that what you have installed on your machine.  Click "Project > Manage > Migrate To...".
Then you'll get a dialog box telling you that your project file's migration has completed.
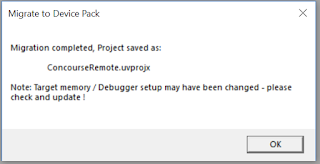

5. Close down your uVision IDE.  You'll notice a new project file.  Open that.  Now you'll (hopefully) notice that the device support error message has gone.


Saturday, March 30, 2019

Woocommerce: How to control inventory of product variations

Lets say you have some t-shirts, and they come in many sizes; S, M, L, XL,  or lets say you have some socks, and they come in different colours: Blue, Grey, Pink and Yellow.


If you run an online store, you'll most likely want to manage your inventory or stock on a colour or size level.  In other words on a product  variation  level.

It would be no good if you had 4 t-shirts left in stock, one of each size, and someone bought one, and customers did not know from the 3 left in stock, which sizes were left.

Well now that you've come across this page, I will show you exactly how to manage your stock on a product variation level for Woocommerce, using plugins and tools that are completely free and easily available.

Let's return to our socks example.


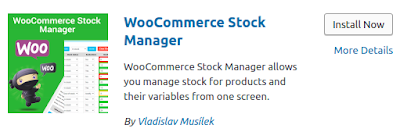
Step 1:  Firstly go to your plugin manager and install this plugin: Woocommerce Stock Manager.  Click 'Install Now' and then 'Activate'.


Step 2:  Go to 'Products', locate the product you want to manage and click 'Edit'.


Step 3:  Under 'Product Data', click the 'Attributes' tab.


Step 4: In our socks case, we will add a new custom product attribute called 'colour' and add 4 values; Blue, Grey, Pink and Yellow.  Make sure you don't forget to check 'also used for Variations'.  While you're here, edit your product to give it a price, sale price (if applicable), shipping weight and shipping sizes, and so on.


Step 5: Now go to up to Product Data and select 'Variable Product'.


Step 6: Go to 'Variations'.  Click 'Add Variation' for as many variations as you have, and add them all.  In this case, we have added all of our sock colours mentioned in the introductory paragraph.   Click 'Save Changes'.


Step 7:  Go back to the Woocommerce Stock Manager plugin, and click 'Show variables' under 'Product Type'.  Add a price, weight and amount in stock for each variation.  Let's pretend we have only one in stock for each colour, except Pink, which has 2 in stock.


Step 8: Click 'Save All' and go to your Product Page.  Now you should see a drop-down box with your product variation, and you should see the amount in stock change as you change the stock variation.  In the below screenshot we show Yellow socks, which have 1 left in stock.


Wednesday, March 20, 2019

Ubuntu: How to get passphrase-less / password-less SSH set up with GoDaddy

Step 1: Login to GoDaddy with your credentials.
Step 2: Click on "My Products", then click "Manage" on the website you wish to use SSH with.
Step 3: Click "Manage Hosting"


Step 4: Once on the Hosting page, click "Settings" on the website whose hosting you want to access via SSH.


Step 5: Click "cPanel Admin".  Now you're on the cPanel for your website's hosting. Click on "SSH Access", then "Manage SSH Keys".


Step 6: Delete any Public and Private keys that you may already have there.  Open a terminal window.  Navigate to your home directory, and then to the .ssh/ directory.
cd ~
cd .ssh

Step 7:  Once here, you may notice that there are already some files, such as id_rsa, id_rsa.pub and known_hosts.  If you wish to back them up, rename them.  Otherwise we will proceed to generate a new key pair (public and private), and overwrite the ones that already exist.
Type the command ssh-keygen -t rsa -b 4096 and press enter.  When prompted for the file name just press <enter> to use the default name (id_rsa), and if prompted to overwrite press y and then <enter>.  When prompted for a passphrase, just press <enter> twice, unless you want to enter in a pesky password every time you login to your hosting in addition to the public/private key pair.  You now have a public and private key pair which you will use to login to your GoDaddy hosting.


Step 8:  Now that you have your public/private key pair, it's time to provide them to GoDaddy so that you're able to login using SSH.  Under "SSH Access" (where we were before), click "Import Key".


Step 9: Type cat id_rsa to print your private key to your terminal window.  Copy it and paste it into the text box provided (shown below).  Leave the first textbox (name) empty, and the passphrase box empty.  Repeat the same process for id_rsa.pub, which is your private key.  Copy that into the last textbox on the page.  Click "Import" at the bottom of the page.


Step 10: Important! Click "Back to Manage Keys", then under Public Keys, click "Manage", and then "Authorize".  If you don't authorize the key, you won't be able to login.


Step 11: Repeat steps 1-4 to get back onto the GoDaddy Hosting page for your domain.  You'll notice a section on the bottom right called "Settings".  Under that section you'll see "SSH access".  If it is turned off, you'll need to turn it on.  Upon turning it on, you'll be presented with the IP address and username that you'll need to log in using SSH.  Note these down.


Step 11:  Open a new terminal window.  Type ssh myusername@<hosting_ip_address>.  Use the username and IP address you picked up in the previous step and press <enter>.  Enter yes when prompted about an unknown host.  And voila!  You're in!  Now you'll be able to access and manage your files from your Ubuntu terminal without ever being asked for a password again!